
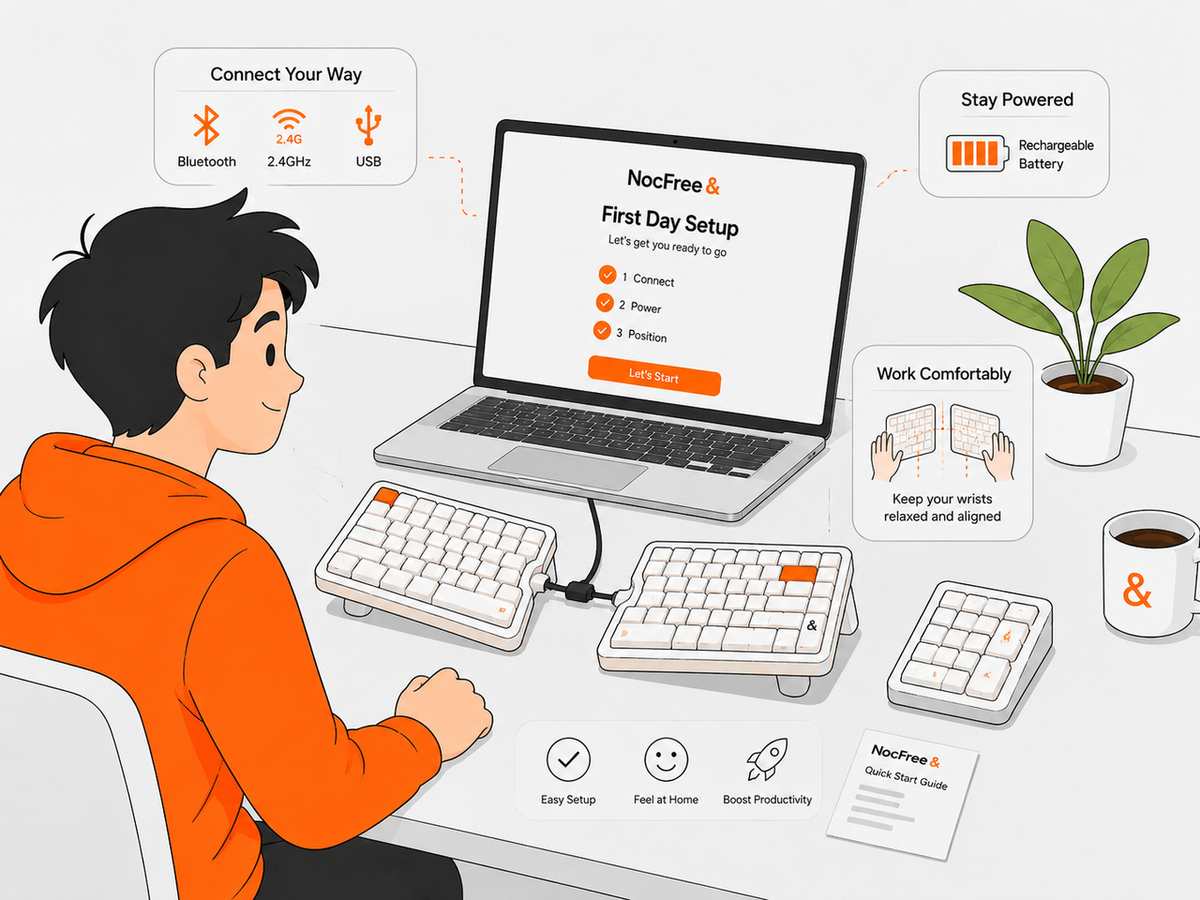
Just unboxed your NocFree &?
Whether this is your first split keyboard or simply your first time using NocFree &, getting started only takes a few steps.
In this guide, we’ll walk you through everything you need for your first day with NocFree &: how to power on both halves, connect through Bluetooth, 2.4GHz, or USB, switch between connection modes, check battery and charging status, and find a comfortable split-keyboard position.
Let’s get your setup ready.

1. Power On Both Halves
NocFree & consists of two independent keyboard halves, so both sides need to be powered on before use.
Left Half
The switch on the left half controls the main connection mode.
You can move it between:
- Top position: 2.4GHz wireless mode
- Middle position: Wired mode
- Bottom position: Bluetooth mode
Right Half
Move the switch on the right half to the bottom ON position.
Once both halves are powered on, they will connect with each other automatically.

2. Connect Your NocFree &
NocFree & supports three connection modes:
- 2.4GHz Wireless
- Bluetooth
- Wired USB
Choose the mode that works best for your setup, and switch between them whenever you need.
Option 1: 2.4GHz Wireless
In 2.4GHz mode, NocFree & gives you a truly wireless split-keyboard setup—no cable is needed between the two halves or between the keyboard and your computer.

How to Connect
- Remove the 2.4GHz receiver from the storage compartment on the right half, just below the NocFree logo.
- Plug the receiver into a USB port on your computer.
- Move the switch on the left half to the top 2.4GHz position.
- Move the switch on the right half to the bottom ON position.
- Wait a moment for the keyboard to connect automatically.
- Start typing to confirm that the connection is working.
In 2.4GHz mode, the left half, right half, and computer communicate wirelessly, so neither keyboard half needs to be connected to your computer with a USB cable during normal use.
Tip for a stable connection: Keep the receiver relatively close to the keyboard and avoid placing it behind large metal objects. If your desktop PC is under your desk, consider using a USB extension cable to bring the receiver closer to the keyboard.
Option 2: Bluetooth
Bluetooth is ideal if you want to use NocFree & with multiple devices, such as your computer, tablet, and phone.
NocFree & supports three Bluetooth channels, allowing you to pair a different device with each channel and switch between them whenever needed.

Enter Bluetooth Mode
- Power on both keyboard halves.
- Move the switch on the left half to the bottom Bluetooth position.
- Move the switch on the right half to the bottom ON position.
Pair Your First Device
The three Bluetooth channels are:
- Fn + 1 — Bluetooth Channel 1
- Fn + 2 — Bluetooth Channel 2
- Fn + 3 — Bluetooth Channel 3
To pair a device, press and hold the shortcut for the channel you want to use for 3–5 seconds.
For example, press and hold Fn + 1. When the indicator starts flashing blue rapidly, the keyboard is in pairing mode.
Then:
- Open the Bluetooth settings on your computer, tablet, or phone.
- Search for available Bluetooth devices.
- Select the corresponding NocFree & device.
- Once connected, the indicator will briefly remain solid before turning off.
Your device is now paired with that Bluetooth channel.
Switch Between Devices
Once your devices are paired:
- Short-press Fn + 1 / 2 / 3 to switch between previously paired Bluetooth channels.
- Press and hold Fn + 1 / 2 / 3 to enter pairing mode for that channel.
On a brand-new keyboard, a short press may also start pairing if the selected Bluetooth channel has never been paired before.
If you want to pair a new device with a channel that has already been used, first disconnect or remove the previously paired device. Then press and hold the corresponding Fn + number shortcut to enter pairing mode again.
Easy way to remember:
Short press = switch between paired devices
Long press = pair a new device
Option 3: Wired USB
Wired mode gives you a simple and reliable connection while also allowing you to access NocFree LINK for keyboard customization.
How to Connect
- Connect the left half to your computer with a USB-C cable.
- Move the switch on the left half to the middle Wired position.
- Move the switch on the right half to the bottom ON position.
The left half communicates with your computer through USB, while the right half communicates wirelessly with the left half.
This means you only need one USB cable connected to the keyboard.
Tip: Use Wired Mode when accessing NocFree LINK for key remapping, macros, lighting, and other customization.
3. Check Battery Status and Charge Your Keyboard
Each half of NocFree & has its own battery, so the left and right halves may sometimes show different battery levels depending on how they’ve been used.
Check Your Battery Level
There are two ways to check the battery level of your NocFree &.
Option 1: Use the Fn + I Shortcut
If your keyboard is running firmware version 2.2.0 or later, press:
Fn + I
The keyboard will automatically type its firmware version and battery information into the active text field.
Look for the number that appears immediately after the letter “B”. This number represents the battery level.
Bluetooth note: If Fn + I does not display the firmware version or battery level while you are using Bluetooth, switch to 2.4GHz Wireless or Wired USB and try again. You can also check the latest firmware information in the NocFree LINK Changelog .
Option 2: Check in NocFree LINK
You can also check the battery level through the NocFree web configuration tool.
To use NocFree LINK:
- Connect the left half to your computer via USB-C.
- Move the left-half switch to the middle Wired position.
- Make sure the right half is switched ON.
- Open link.nocfree.com .
Once NocFree LINK recognizes your keyboard, you can view the left and right battery levels in the top-right corner.

Battery Indicator in Wireless Mode
When you are using the keyboard wirelessly:
- Flashing red — The battery is low and that half of the keyboard should be charged soon.
This applies when using the keyboard in wireless mode without a charging cable connected.
How to Charge Your Keyboard
Each half of NocFree & can be charged through its own USB-C port.
To charge the keyboard:
- Connect a USB-C cable to the half you want to charge.
- Connect the other end to a standard USB port or a 5V⎓1A power adapter.
- If both halves need charging, connect each half separately with a USB cable.
You can continue using the keyboard while it is charging.
Charging Indicator
- Solid red — The keyboard is charging.
- Light off — The keyboard is fully charged.
When the red indicator turns off, charging is complete.

Important: Avoid using fast chargers or higher-voltage power adapters. We recommend using a standard USB port or a 5V⎓1A power adapter.
4. Find a Comfortable Split Keyboard Position
If this is your first split keyboard, you don’t need to find the perfect position on day one.
Switching from a traditional keyboard to a split layout takes a little time, so we recommend starting with the two halves together and gradually moving them apart as your hands adjust.
Give yourself around 7–14 days to get comfortable with the new layout.

Step 1: Start Together
Begin with the two halves placed close together, almost like a traditional keyboard.
Use NocFree & this way at first to get familiar with the split layout without making a big change to your usual typing position.
Step 2: Open by About 2 cm
Once the layout starts to feel comfortable, move the two halves approximately 2 cm apart.
Keep typing in this position for a while and let your hands adjust naturally.
Step 3: Add Another 2 cm
When the small gap feels comfortable, move the two halves another 2 cm farther apart.
There’s no need to rush. Gradually increasing the distance makes it easier to adapt without forcing your hands into an unfamiliar position.
Step 4: Find Your Fit
Continue making small adjustments until you find a position that feels natural and comfortable for you.
There is no single “correct” distance between the two halves. Your ideal setup will depend on your body, typing habits, desk space, and personal preference.
Remember: Feeling a little awkward at first is normal. Give yourself time to adjust, and let your keyboard position evolve gradually over your first 7–14 days.
Using the Tenting Base
Start with a moderate tenting angle and adjust gradually until you find the position that feels most comfortable for your wrists and hands.
You’re All Set 🎉
That’s it—your NocFree & is ready to use.
You now know the essentials for getting started: how to power on both halves, choose the right connection mode, check and charge your battery, and gradually find a split-keyboard position that feels natural to you.
If this is your first split keyboard, don’t worry if it feels a little different at first. Give yourself time to adjust, experiment with the distance and angle between the two halves, and let your setup evolve around what feels most comfortable for you.
As you get familiar with NocFree &, there’s even more to explore—from customizing your keymap, macros, and lighting in NocFree LINK to keeping your keyboard up to date with the latest firmware.
For more detailed instructions, visit the NocFree & User Manual .
If you run into any questions along the way, reach out to the NocFree Support Team at contact@nocfree.com , or join our Discord community to ask questions, share your setup, and connect with other NocFree users.
Enjoy your NocFree &—and welcome to a more flexible way to type.


1 コメント
장원철
… 업데이트가 너무 어렵네요… 잘 안됩니다
녹프리 폴더로 전송 중 창이 닫힙니다
コメントを書く
このサイトはhCaptchaによって保護されており、hCaptchaプライバシーポリシーおよび利用規約が適用されます。